How to Make Melt and Pour Soap
Easy Melt and Pour Soapmaking
Melt and pour soap is a great way to start off your soap making journey. It’s as easy as the name suggests – just melt and pour! There's far less to learn than when making soap from scratch using a cold process method so it's perfect for beginners and children who are old enough to understand heat can burn. You can customise it with your favourite fragrances, essential oils and colours.
Bases
PureNature Melt and Pour (M&P) soap bases are available in many different types - Aloe Vera, Shea butter, Hemp Seed and Organic to name a few. The bases are either clear or white. In the clear bases, colours and pigments will be brighter and in white bases, a pastel colour. M&P soaps are also known as glycerine soaps. Glycerine is a humectant and draws moisture to the skin to keep it hydrated, but that also means these soaps can sweat in humid conditions. We recommend shrink wrapping your soaps to avoid sweating - find our soap bases.
Fragrance
You can fragrance your soap with fragrances or essential oils. The usage rate for fragrance is typically 3-6% but be sure to check on the individual fragrance for the exact amount, fragrances tend to be stronger than essential oils and 3% is often enough. Fragrances will last well in soap whereas essential oils tend to fade a bit quicker. You can choose either depending on your needs. The usage rate for essential oils is also around 3% but be sure to check first as most essential oils have a maximum dermal limit and some are skin irritants or not safe for children. Sticking with essential oils like Orange, Lavender and Lemon is a safe option. Find essential oils and fragrances.
Colour
Colouring your soap is easy and the most popular option is Mica. Mica is available in a vast range of colours to delight your inner artist. Depending on how strong you want your mica colour, start with a half of a teaspoon per 500gms of soap and work up from there. You can also use Granulated soap pigments which come in the primary colours and are dissolved into water to make a liquid concentrate. These are typically used at 0.04-0.02%. Granulated soap pigments are very economical and will last you a long time. Other options are neon pigments, liquid soap dyes and clays. Clays are a fun way to add a little gentle exfoliation and naturally colour your soap. Lakes are not compatible with M&P soap. Find our soap colours.
Moulds
We recommend using silicone moulds for your soap, they can withstand a high heat and your soap will pop out of the mould effortlessly. If you are using any other plastic moulds, just check your melted soap isn't too hot before pouring so as not to melt your mould. Soap bases melt at around 48°, be careful not to boil your soap and take care when handling the melted soap. Find our soap moulds.
Tips
Having a bottle of Isopropyl alcohol (IPA) on hand is a hot tip for M&P. After pouring the soap, spritz with IPA to pop any bubbles that rise to the surface. When layering soap, spritz with IPA to help the layers adhere properly.
Our soap bases can hold an extra 5% of added ingredients. You can experiment with adding ingredients like fragrances, essentail oils, butters, carrier oils and exfoliants. Be sure to test first!
Example - 1000g x 5% = 50g maximum of added ingredients, 450g x 5% = 22.5g maximum of added ingredients).
Equipment
- Pyrex Jug, beaker, mould, teaspoon
METHOD
- Have all your colours, fragrances and moulds ready before melting the soap.
- Chop up the soap base into cubes and place into a glass pyrex jug or heatproof bowl. You can melt it in the microwave in 30sec bursts or use the double boiler method.
- When the soap is liquid let it sit for a minute whilst gently stirring so the soap doesn’t form a skin on top. When it has cooled slightly add your fragrance and mix well. Adding the mica/colour into the fragrance first helps disperse it through the soap. You can also use 1 teaspoon of Isopropyl to disperse it.
- If you are using exfoliants or clay add them now.
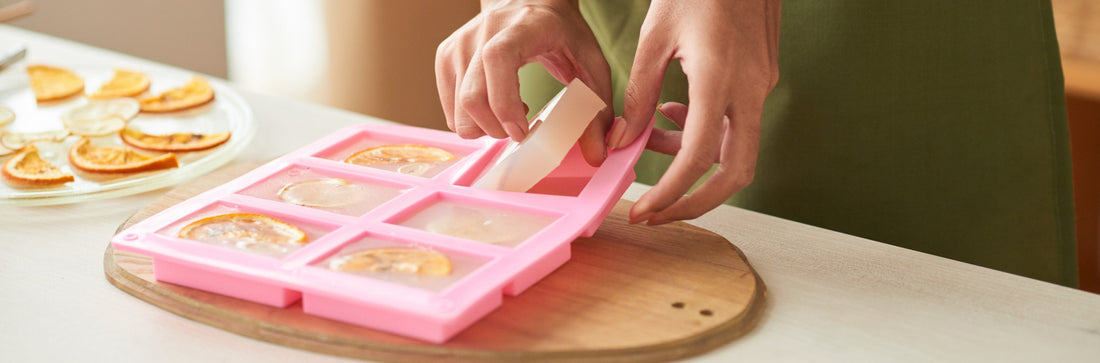
- Pour your soap into your moulds and lightly spritz with ISO. At this stage dried flowers or bioglitter can be sprinkled on the top.
- Leave the soap to set for 2-4 hours until it is hard. Pop it out of the mould and its ready! Remember to wrap it.
Here are some recipes to get you started or you can use our easy DIY Melt & Pour Soap Kit.